Tips For Photographing Black Dogs
Black and white dogs are some of the hardest pets you’ll encounter to photograph simply due to their coloring.
Cameras often struggle with focus on black or white dogs due to the lack of contrast (areas of light and dark) on the face.
But, whether you’re an amateur pet photographer, a budding professional, or simply a pet parent that wants to learn how to take more adorable photos of your black dogs without loss of detail, I’ve got eight tips for you to elevate your photography when it comes to black dogs specifically.
If you prefer to watch or listen to your content, I also have a full YouTube video all about this, too. You can watch that here.
Of course, if you have questions or comments regarding anything in this post, be sure to drop them in the comments or leave a question over on YouTube. I’d be happy to help or answer any that I am able to!
Now, let’s chat all about tips for photographing black dogs (some of my favorite dogs to photograph!).
Want more quality Pet Photography content to help you grow your business? Subscribe to our YouTube Channel!
Psst… love this post? Be sure to pin it for later!
Tips For Photographing Black Dogs
1 MAKE SURE YOU HAVE A LOT OF AVAILABLE LIGHT
It is so easy for the detail of a black dog to get lost, so we want to make sure that we are working with a lot of light when photographing a black dog.
I recommend trying to photograph them during the brighter part of your session before you lose too much light.
Or if you have multiple dogs in the pack that you’re photographing, start with the black dog first, so you have the most light for that pup as you work through the session.
If you need to start your session a little earlier than normal to account for multiple dogs in a session or especially multiple black dogs, then do it - you’ll be thankful you did!
Obviously, the length of time needed and at what time you start taking photos, will also depend on the location of choice, the type of shoot it is, the final result you are working towards, how fast you are and your experience level, and most importantly, the light.
But like I said, since we are working with a challenging subject (i.e. a black dog), then we need to set ourselves up for success and that means taking note of how much light we have to work with when photographing a black or even darker colored dog!
2 POP LIGHT IN THEIR FACE
That brings me to the next point which coincides with the first is to make sure that there are catchlights in their eyes and plenty of light on their face.
What I like to do here is to make sure the dog is facing some kind of light source, either open sky, facing the sun when it’s low enough on the horizon, or even using a small reflector if need be!
Having enough available light and facing the right direction ensures the dog’s face is illuminated and they are well lit, too.
Depending on your technical knowledge and comfort level with artificial lighting, utilizing off camera flash can be very useful also for lighting up their face especially in a low light scenario.
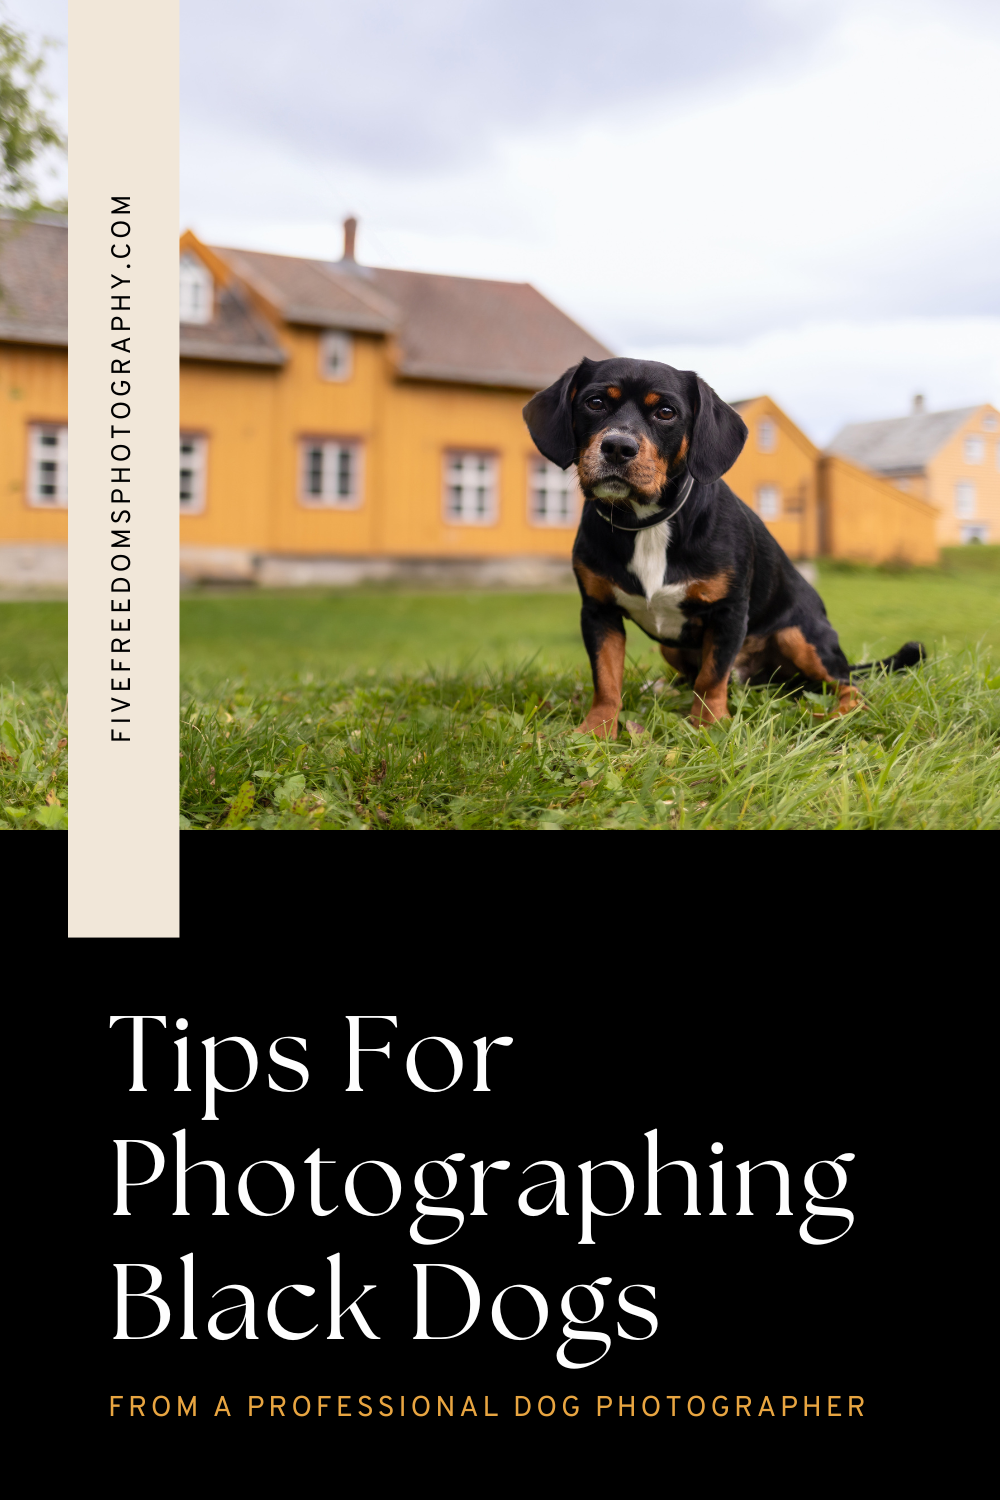
In this photo of Alvin below, the sky was naturally acting as a huge softbox on a cloudy, rainy day, so the light was diffused and soft creating big, beautiful catchlights in his eyes!

3 MAKE SURE YOU CAN IN FACT SEE THEIR EYES
Next, make sure you can in fact see their eyes! A lot of curly haired breeds, specifically poodles, sometimes the notable style for that breed is for the pup to have long hair that lays or hangs into the eyes.
I always ask clients to have their pet groomed at least a few days in advance and if it’s okay, to have the hair around their eyes trimmed enough to see their eyes, otherwise, your camera will have a difficult time focusing on the face especially if you use eye detection or recognition.
I have found when you can’t see the eyes, the photos feel lackluster because the subject isn’t engaging with the camera even if they are looking at the camera.
I also mention this because I’ve noticed that some black dogs have very dark colored eyes meaning that you are already working with a more challenging color of dog and eyes their dark eyes that don’t pick up as much light, so making sure you can see their eyes is just another thing to think about and consider when photographing black dogs.
4 USE A HIGHER APERTURE
Like I mentioned a moment ago, because your camera has trouble focusing on a dark dog’s face and eyes, try using a slightly higher aperture when focusing on their face, so something like an f/4.
Using a higher aperture means that there is a wider depth of field making it much more likely for the face and eyes to be sharp even if your camera is having trouble catching focus. In my experience of photographing black dogs, a lot of time the camera catches the nose, but the eyes are slightly soft.
By increasing your aperture, if your camera does catch the nose, the eyes will most likely be in focus, too.
This is a very common mistake most new photographers make, because they want to shoot wide open at a very shallow depth of field, such as f/2.8, which means that only a small bit of the image will be sharp. That is setting yourself for failure especially if you struggle getting pets in focus!
Add in a black dog with long hair and dark eyes and you truly will struggle to catch focus.
I recommend practicing with a larger number aperture first, such as f/4, so you can practice getting the dog tack sharp and nailing your focusing settings - then reduce your aperture later on when you feel more comfortable and can make more stylistic approaches to your work.

5 ADJUST YOUR EXPOSURE
I have found when photographing black dogs, your camera will freak out a little bit because it’s trying to expose for this huge dark spot in the center of the frame. When it does that it tends to overexpose your black dog making them look dark gray or off color.
To prevent this, you’ll want to generally underexpose the image intentionally a stop or two in order to accurately correct the exposure manually, so the black dog looks like a black dog.
Doing so can prevent your highlights and shadows from being clipped on the histogram depending on whether the dog you are photographing is black or white.
Then from there, you can adjust the shadows and highlights as needed in post-production to ensure your black dog is looking their very best!
6 PUT THE BLACK DOG CLOSEST TO THE LIGHT SOURCE
If by chance you are working with multiple dogs at a session or pets and people with a black dog, always make sure the black dog is closest to the light source if possible.
If your black dog is furthest away from your light source in an image with multiple pets and people, you will lose a lot of detail in the animal. They may look like a huge black blob in the image, which nobody wants from their pet’s session.
So, the trick here is to move them to the side or end closest to the light source whether that’s the sun or studio lighting, so that you can gather lots of detail and light in their eyes and they are balanced with the other subjects in the image.

7 PUT THEM ON A CONTRASTING BACKGROUND
Another great trick for photographing black dogs is to put them on a brighter, more contrasting background. I love utilizing a parking lot, concrete, light colored wall or building, or a pretty walkway to use as a backdrop for a black dog.
This is two fold: one, the animal really stands out against the lighter colored backdrop and two, as I mentioned earlier, the lighter background is going to help with light by acting as a fill light underneath / around the dog.
Try as much as possible to avoid putting a black dog on a really dark background or area with very little light as it will make photographing them that much more challenging (i.e. black dog at dusk in a forest setting - Not a good idea).
8 ADJUST THE DOG IN POST PRODUCTION
If all else fails because when you are working with pets and things don’t go to plan, you can always adjust the dog in post-production. I still want you to follow what I taught in this post, because it will help you maintain detail, light in their face, and catchlights - all of which are super important for a stunning image.
All you have to do later in post-production is darken the shadows or deepen blacks, brighten eyes, or even adjust the color temperature of the dog’s black fur, but hopefully, not much more than that.
All in all, there is an art form to photographing and working with black dogs! I hope that you found these tips helpful in your next foray to photographing a black dog.
Which one was the most helpful for you? Share in the comments below!
OTHER POSTS YOU MIGHT ENJOY
Tips For Photographing Blind / Deaf Dogs
Camera Equipment I Use As a Natural Light Pet Portrait Photographer
My Camera Settings As A Natural Light Pet Portrait Photographer
FREE RESOURCES TO HELP YOU FURTHER
Start Your Pet Photography Checklist
EDUCATION YOU MIGHT FIND HELPFUL
50+ Ways To Market Your Pet Photography Business
Strategic Ways To Market Your Pet Photography Business Virtual Workshop
101 Blog Post Ideas For Pet Photographers
All images are copyright of Five Freedoms Photography. For licensing or image usage, please contact us here.
